Are you seeking how to whiten teeth in Photoshop? Actually, the Teeth are one of the vital parts of the human body. People who are not aware of their teeth may lose brightness. However, photographs with white teeth seem appealing than normal ones. Is there anyone, who doesn’t expect the beautiful looking on his/her face? Indeed, a smiling face ensures an appeal where white teeth are significant. But in the curse of time, you have to shoot the photograph with yellow teeth, and they affect your pictures of superb looking. But how will you fix them? You can fix out the problem right now with Photoshop. How to whiten teeth in Photoshop is the main topic of this post.
In this article, we are going to present the best idea for whitening yellow teeth. Photo editing experts know many ways to whiten teeth using Photoshop. But in this tutorial, we share with you the easiest way of how to whiten teeth in Photoshop. After following this content, everyone will feel calm with the result. Let’s start the mission step by step with Adobe Photoshop CS3. You can use any version of Photoshop.
Table of Contents
How to Whiten Teeth in Photoshop: Step by Step Tutorial
Step One:
If you want to know how to whiten teeth in Photoshop, firstly, you should open your image on your photo editing software. It is regarded as basic editing. Your skill will help to improve the looking of your teeth. After loading the picture, you should fit your image to the adjusted level.
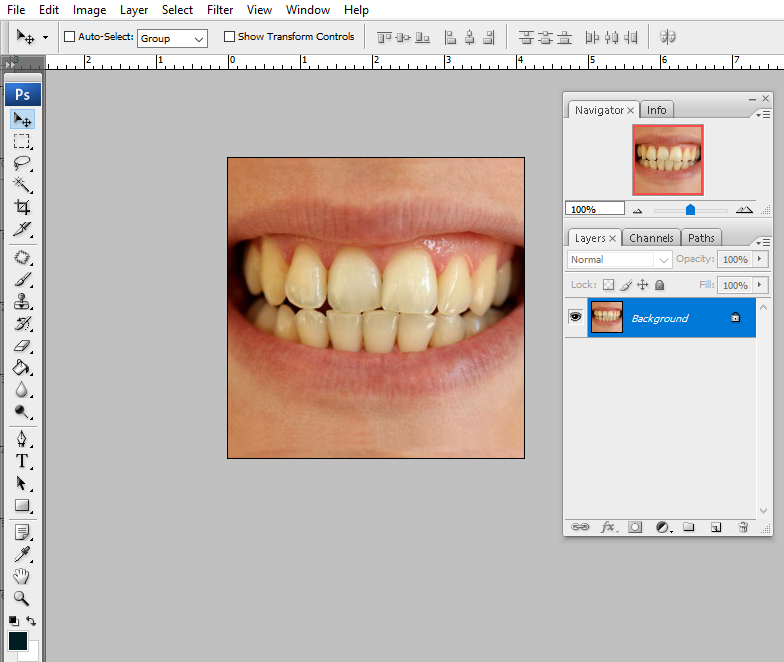
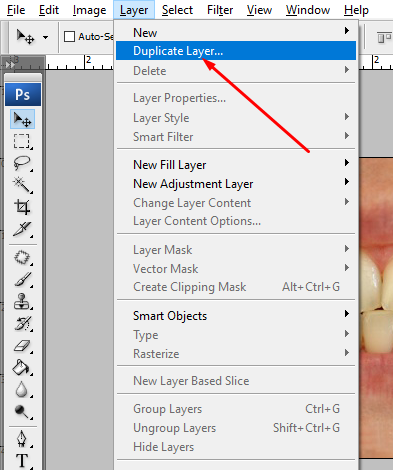
However, make a copy of the layer by clicking Layer> Duplicate layer or press Ctrl + J from your keyboard.
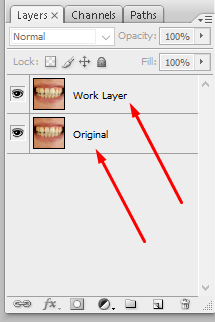
Now and rename the layers as you want. Here I use the original layer and work layer. Always keep the original layer to compare the final result.
Step Two:
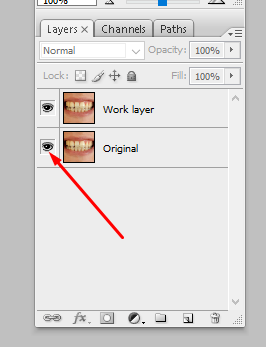
In this step first, click on the eye icon of the original layer and hide it.
Now we need to make a selection of the teeth. To select the yellow teeth, you can take Lasso Tool (L) for quick selection, and carefully select the affected yellow teeth.
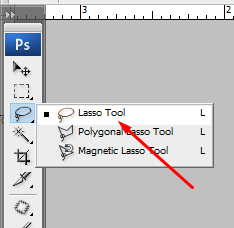
If you want to do the action perfectly, you need to zoom the photo holding Ctrl and + sign from the keyboard and zoom out use Ctrl and – button.
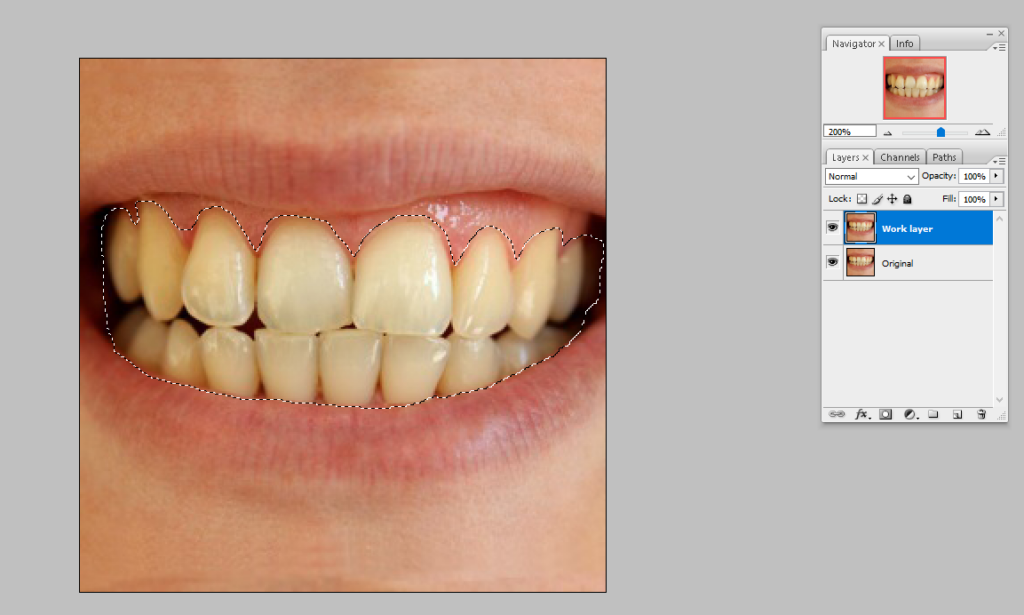
You should do the action manually.
Step Three:
In step three, you need to click on the layer from the top bar > new adjustment layer > Hue/ Saturation.
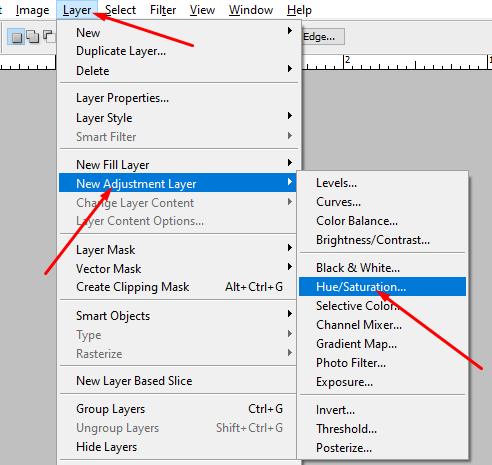
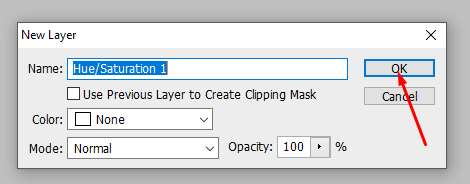
Now click ok
You can see a new dialogue box Hue/ Saturation.
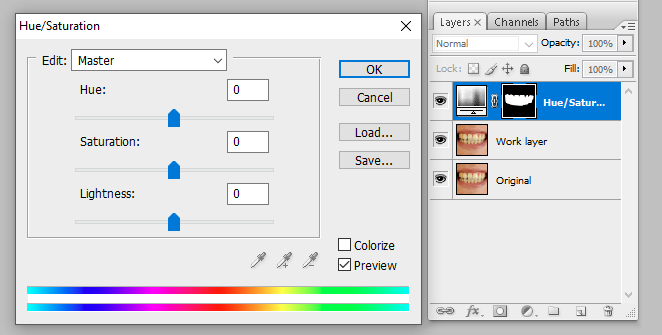
Step Four:
You will find a “master” pad to edit the yellow part of your picture. On the master pad, there you will get 3 three panels: Hue, Saturation, and Lightness. This adjustment will affect the selected area greatly. Although it is your own choice, we kept hue/-10, saturation/-29, and lightness/ +13. In this selection.
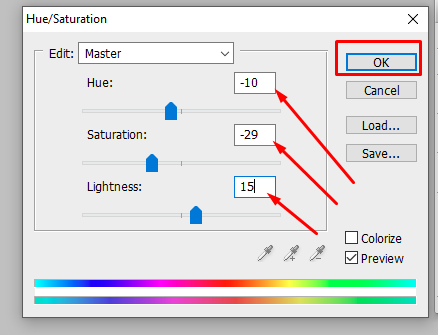
We have gotten the white teeth, but we will find some rough areas at the edge of the section.
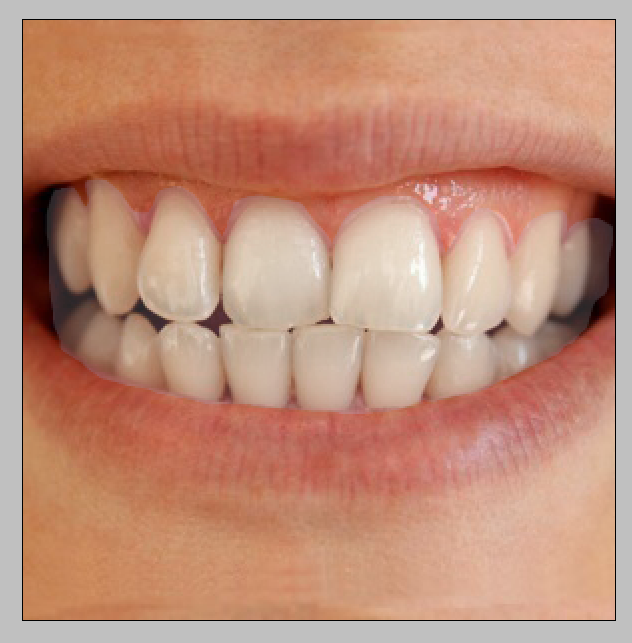
Step Five:
To adjust the selection edge, take Brush Tool (B) from the left tools panel. However, you will get a color pad on the right side where you have to take positive colors on your brush tool and adjust them carefully. In this way, you will find your expected white teeth.
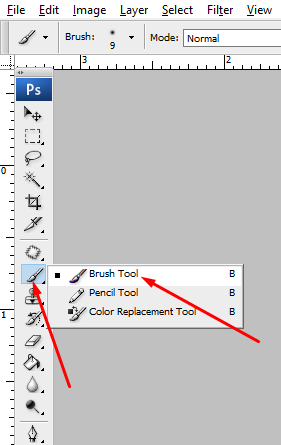
Finally, you have to save it on your desktop or laptop.
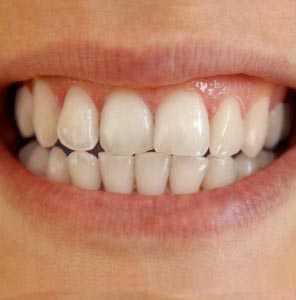
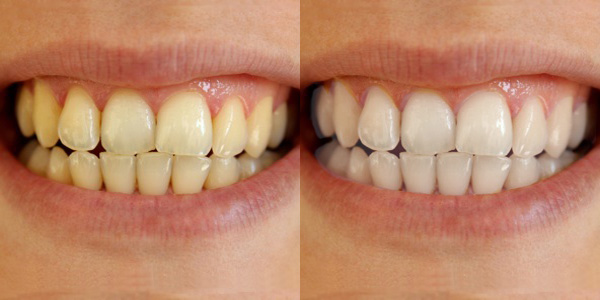
Now compare your teeth before and after.
Conclusion:
How to whiten teeth in Photoshop has become a trend to the digital requirements. There you will find many ways, but the above way is easy and short-cut to whiten from yellow or dirty teeth. Absolute perfection certainly remains in your proper practice.


