All of us know that Background removal from a photo whether it is a product or a person is not a very difficult task. But most of us don’t know how to remove background around the hair in Photoshop. Most photography professionals fall into difficulties when they want to change the background behind the hairy objects or flying hair of a model.
In this tutorial, we are going to learn an easy step by step tutorial on how to delete and replace background from hair in Photoshop. If you try to follow the steps below and keep practicing, I believe you can teach others how to cut out image background around the hair. Similarly, you can replace the background with another.

Table of Contents
Step 1: Make a Clipping Path Around the Photo
This is the first step. Choose a photo that you decided to work on and open it on Adobe Photoshop. Now make a clipping path around the photo as I showed the example picture below:
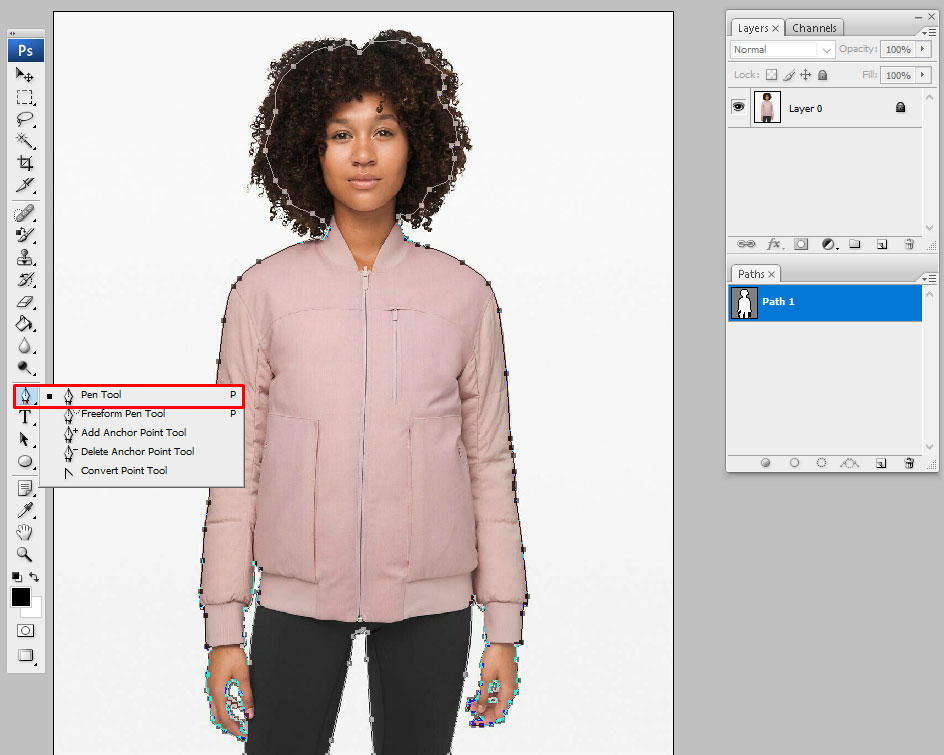
Make sure to keep the hairy background part outside of the path.
Step 2: Create a Duplicate Copy of the Image Layer
In this step, you need to create a copy layer of your projected image. So, you should click on the layer option from the top options panel bar then follow the picture below or press (Ctrl+J) from Keyboard:
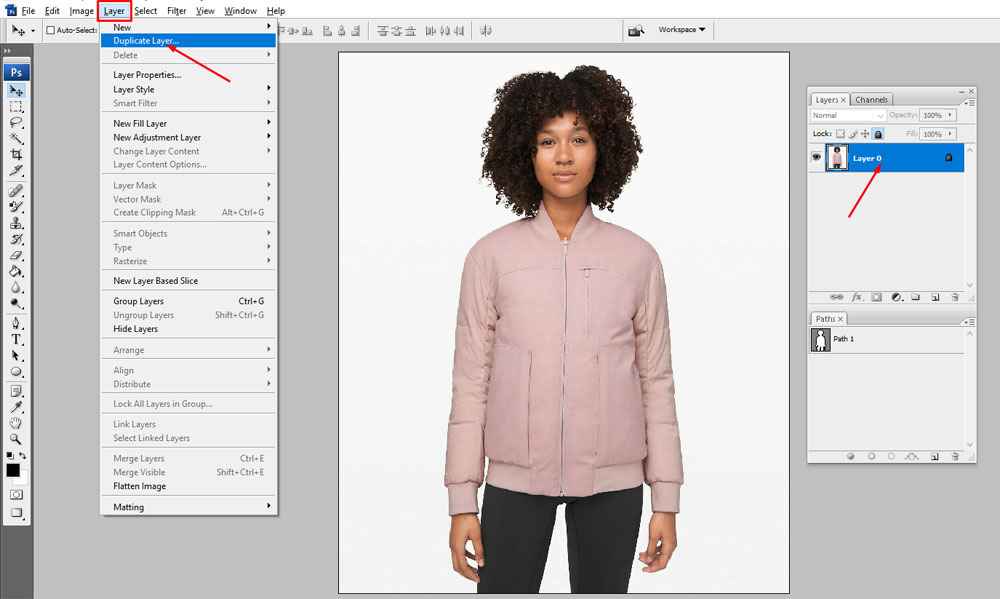
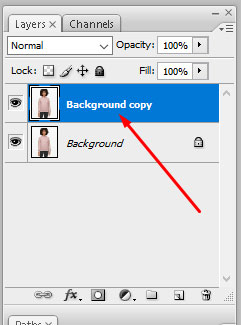
A copy layer has been created on the panel:
Step 3: Make a New Fill Layer with Solid Color
Make a solid color background using the new fill layer option. First, select the original layer next click on the layer bar on the options bar next click new fill layer next solid color.
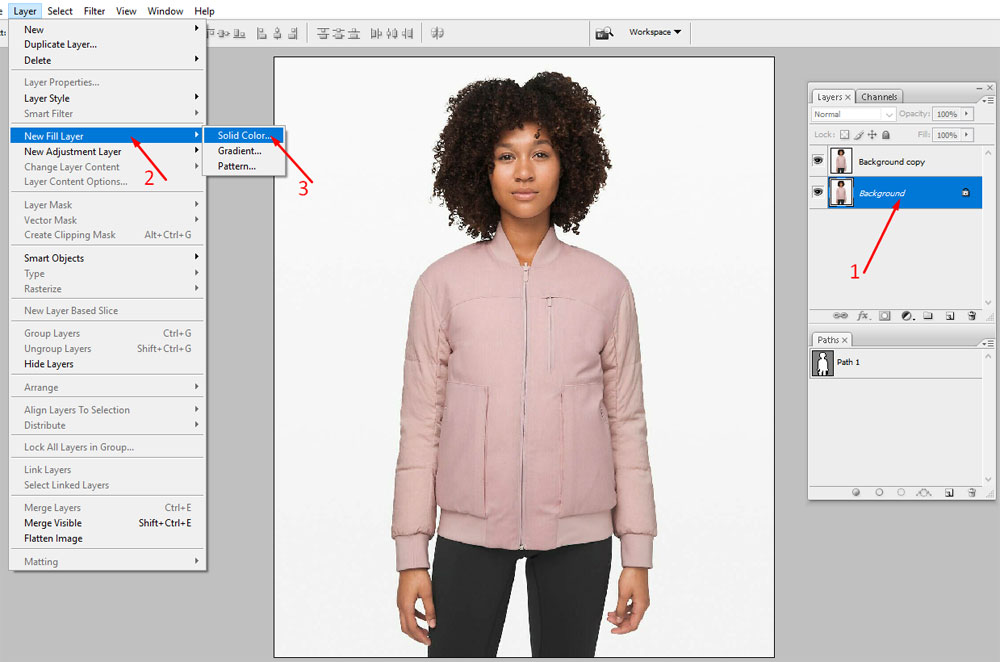
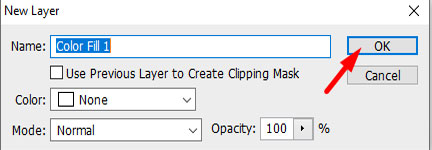
You can see a new dialog box like below, click ok
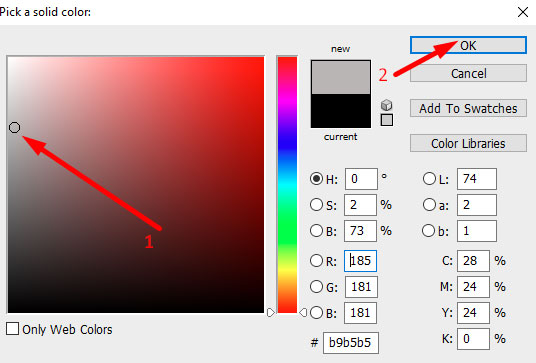
A color box will open and you should choose a dark color then click ok. It is up to you which color you want to choose, but the color must dark.
Step 4: Make a Selection of the Path And Inverse:
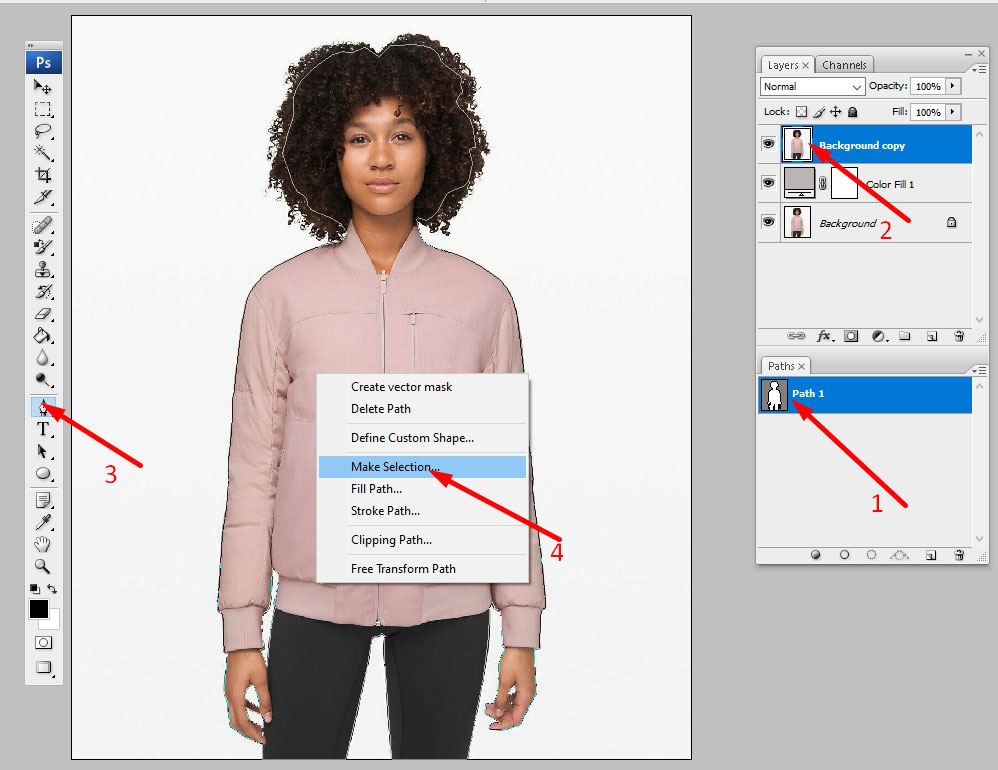
Select the path layer from the layer panel then click on the copied layer next select pen tool and click the right button of your mouse on the image after that click make a selection.
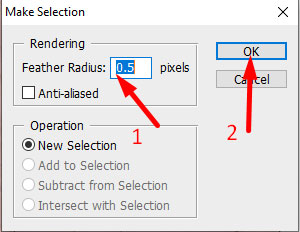
You can see a new dialogue box put 0.5 on the feather radius and click ok.
The path will be selected around the photo. After making the selection around the photo we have to inverse the selection. For this, you need to go to select a menu from the top menu bar and click on the inverse.
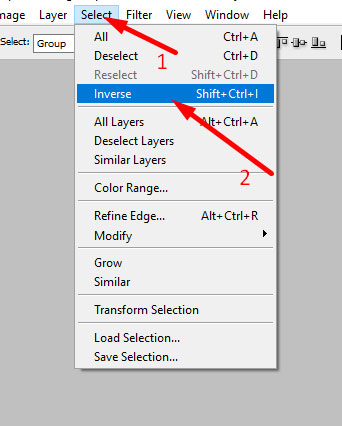
Step 5: Delete the Background from Hair with Background Eraser Tool
We are ready to remove the background around the hair portion of the photo. We now go to the toolbar and select the background eraser tool from there.
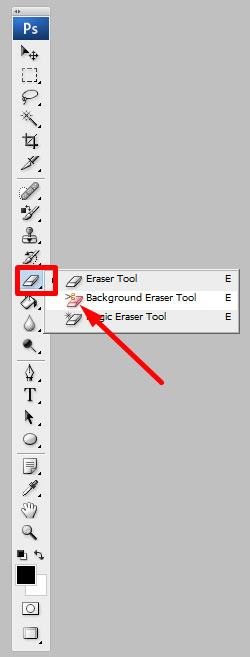
Don’t forget to set the following setting when you use the background eraser tool for removing the background behind the hair.

The brush size and tolerance will vary with the complexity of the background.
Now click your mouse on the background near the hair portion.
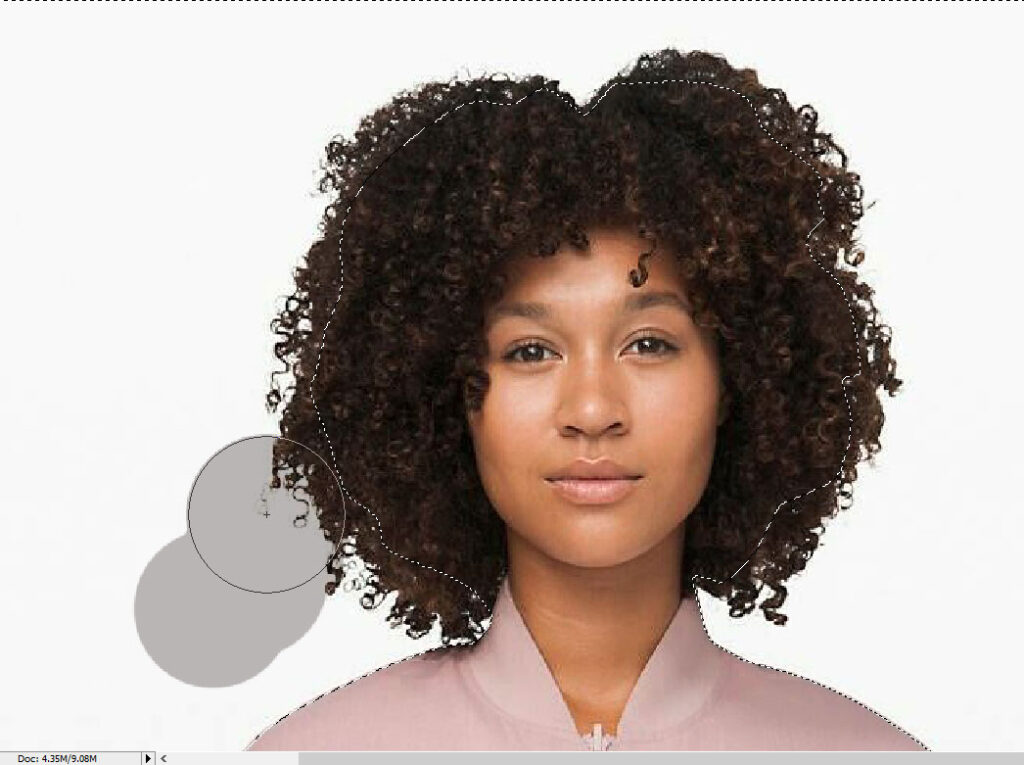
And then move it over the whole hair background outside the selection.
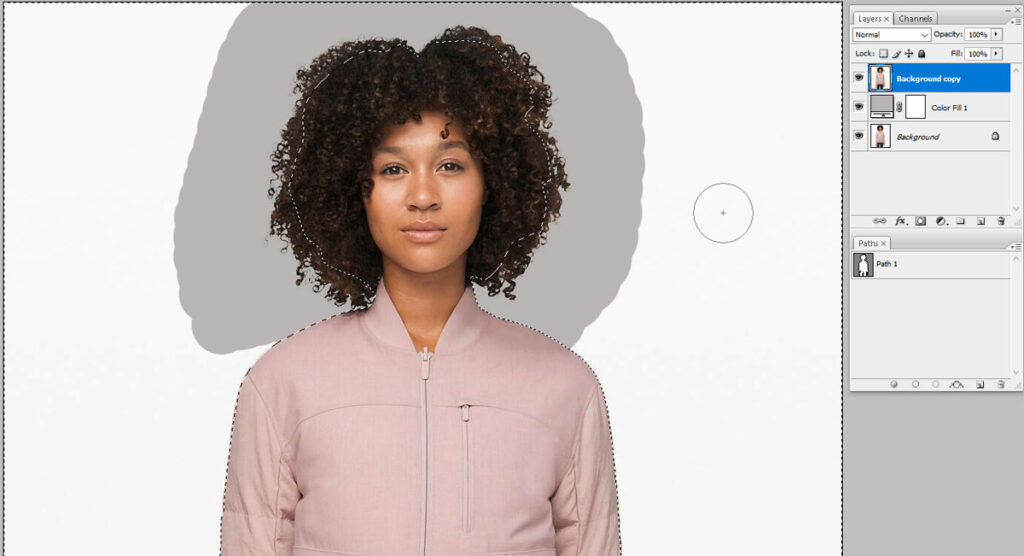
Step 6: Add the Separated Hair to the Main Selection with Lasso Tool
At the last step we learned how to remove background around hair in photoshop, now we add the separated hair to the main selection with Lasso Tool in Photoshop. Simply select the Lasso Tool and draw a line like the following Photo.
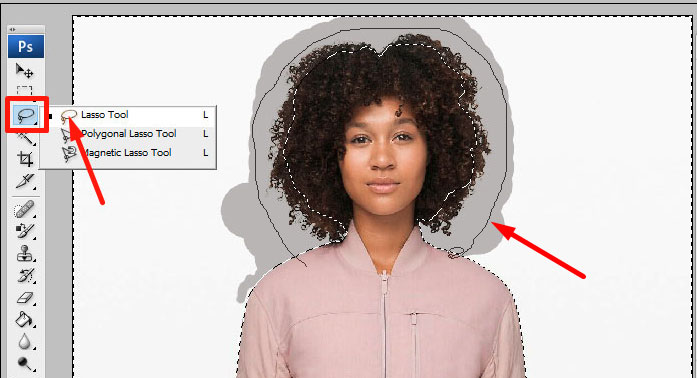
Step 7: Remove Background from the Image
This is the final step and in this step, we are going to remove the whole background from the image. Just click on the Edit menu and then clear.
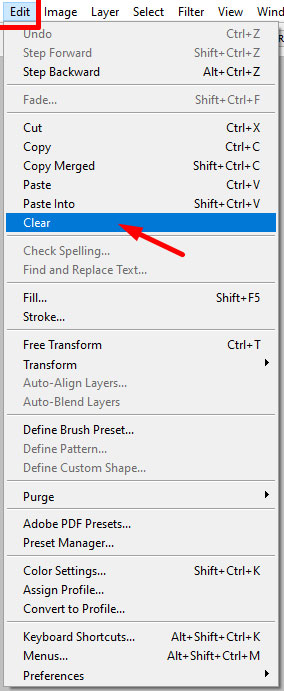
Check the result is below
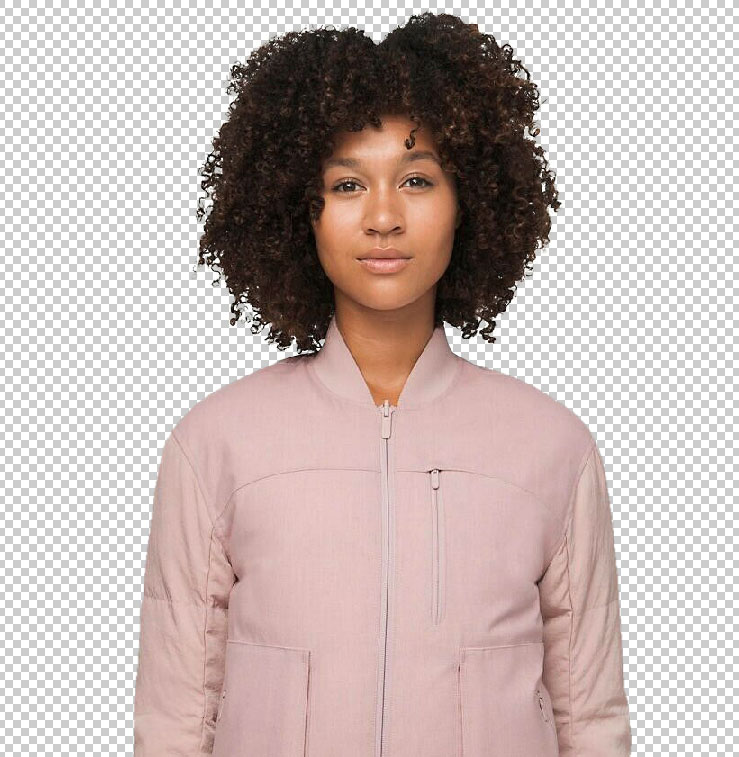
Save this photo in a PNG format. A PNG transparent image will applicable in any background.


