Are you a product photographer? Do you have a vast collection of the same category and different color products? And you get an order to pick a photo of all of them? There is a simple way to avoid shooting all the photos of the same category multiple color products. If you know how to change the color of an image in Photoshop then it will be a very easy task for you.
Adobe Photoshop is the most popular and vastly used photo editing software which is frequently using in most of the photo editing service provider companies. Almost all of the photo studios are using this as well to edit their photos. This is a really amazing software if you can learn all the functions of this. There are many updated versions of Adobe Photoshop in the market. It is up to you which version you want to use. But sometimes some backdated version is works good than an updated one.
Today, I’m going to help you to know how to change the color of an image in Photoshop CS3 very easily. Here I prefer CS3 because this is easy to learn for the beginner. After completing this tutorial you can change color of image in a very smart way. Let’s start:

#Step 1 Open The Projected Image:
We took a Light Green t-shirt to make that a Deep Red one. You should use our original photo for practice change color of image. First, you have to open your projected photo in Adobe Photoshop CS3. Now you need to select the color areas which you want to change.
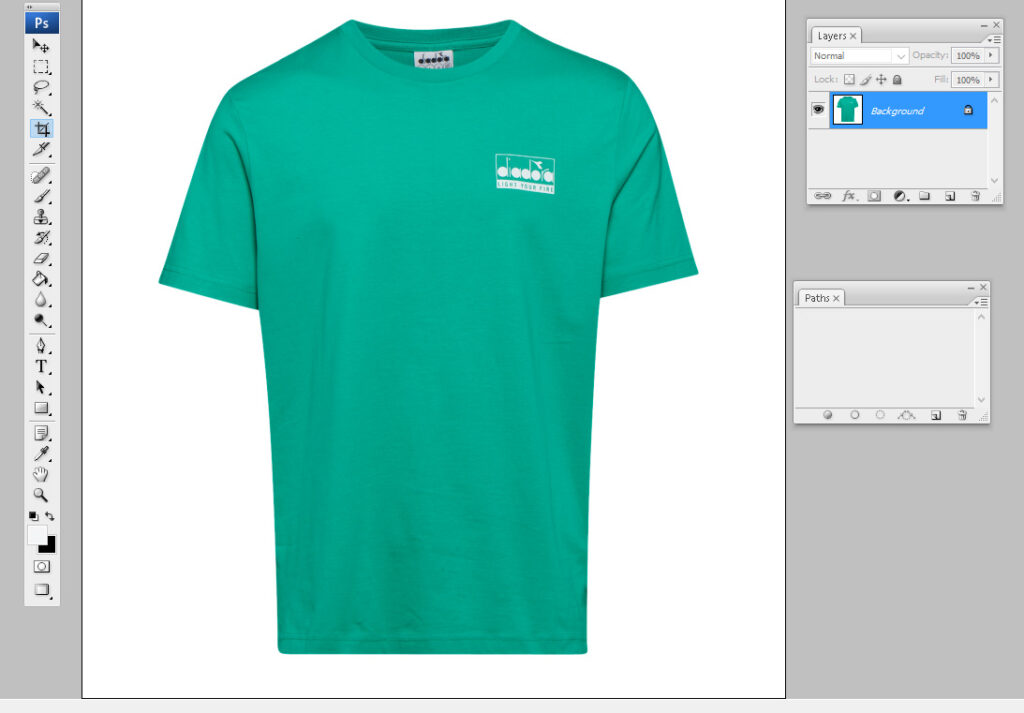
#Step 2 Select the Color Areas of The Image:
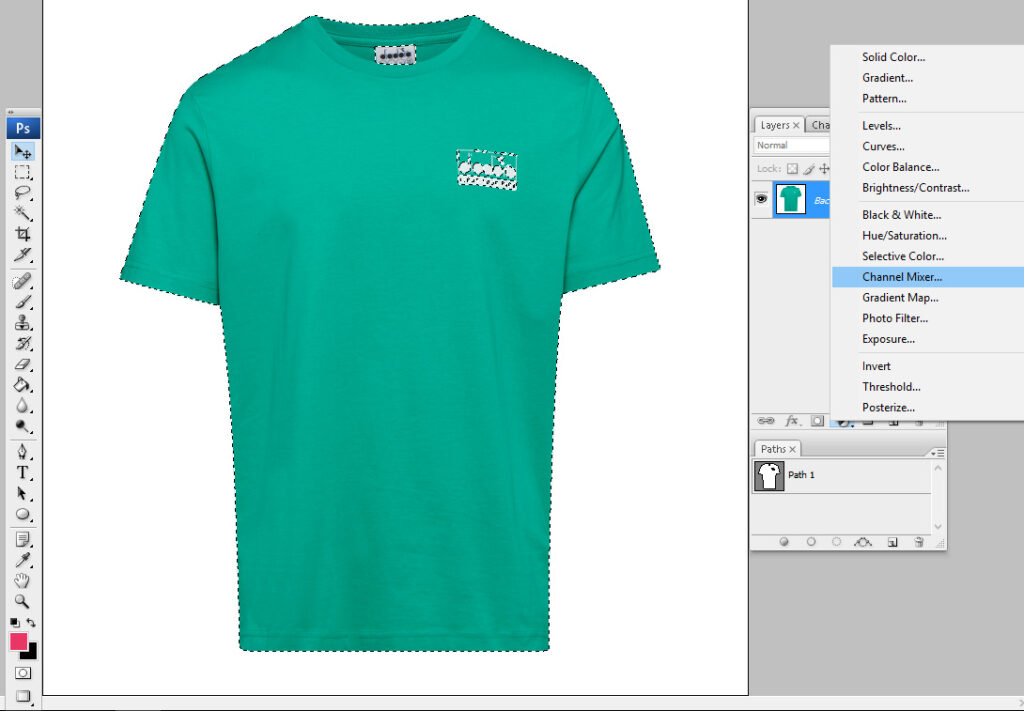
Now you need to select the color areas which you want to change. There many short cut tools to select the color area in Photoshop but the pen tool is the best option for this. You will get the highest outcome with the pen tool. However, select the pen tool from the toolbar and draw a path around the shape. Just look at the following picture and follow:

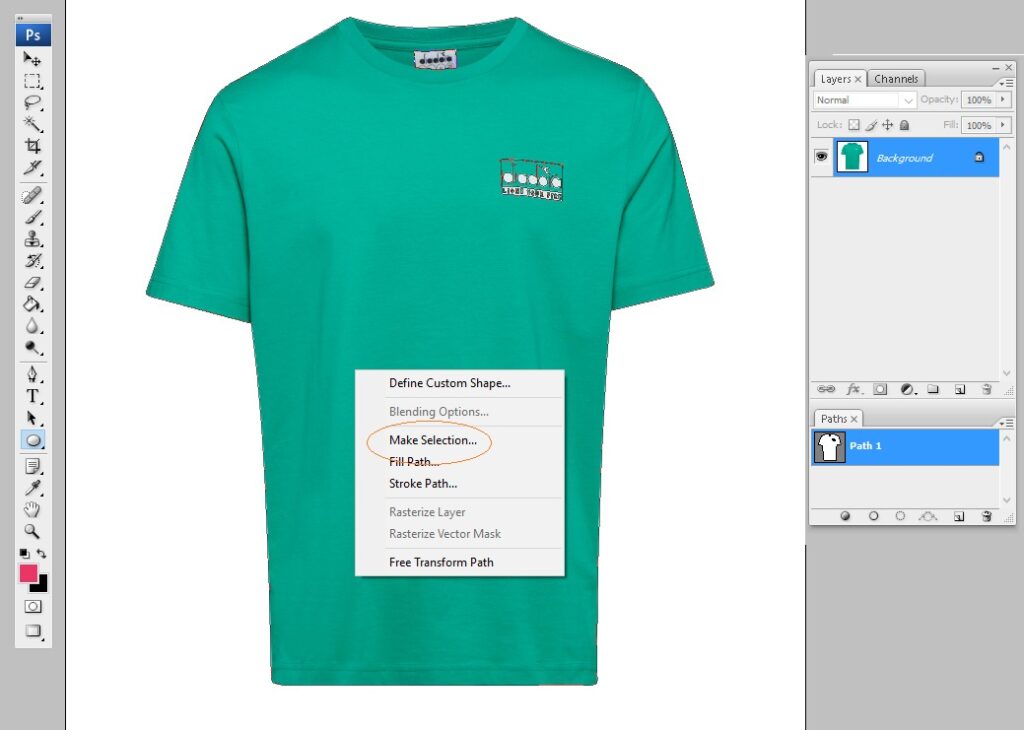
You should not select any detail parts (logo, or level, etc.) of the image. If you complete the path around the color as it is on the above photo now select the path. You need to click the right button over the photo then click on make selection (make sure you are on pen tools in this stage).
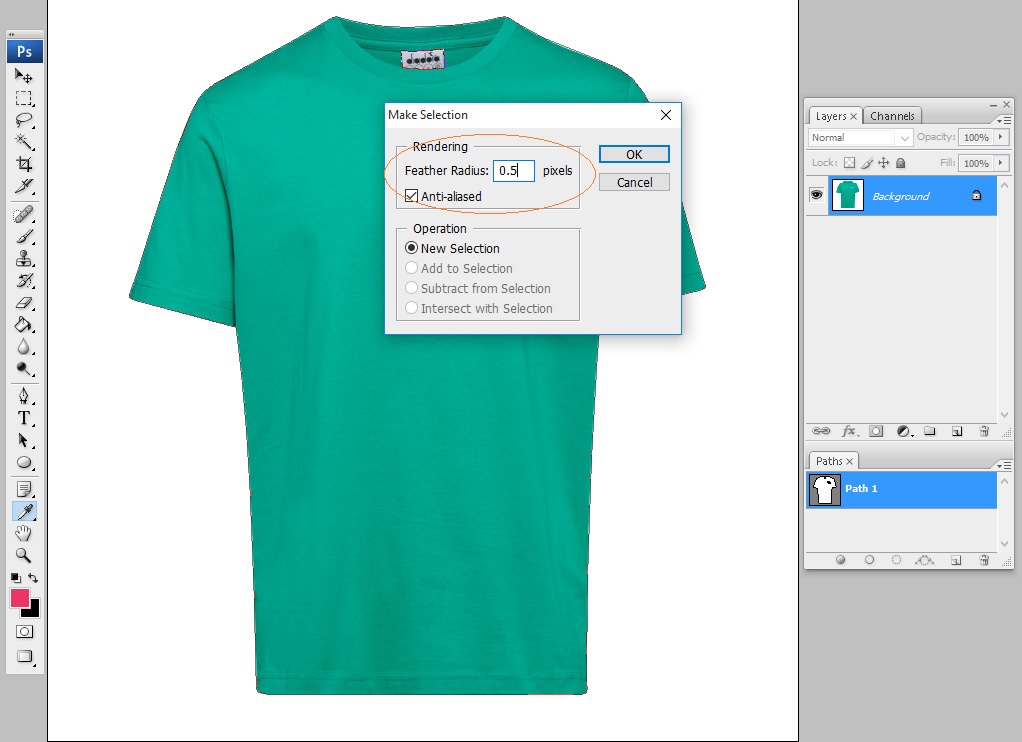
Now you will get another dialogue box like below and select 0.5 feather radius then click ok. You can select father manually using Alt+Ctrl+D
#Step 3 Use Channel Mixer from Adjustment Layer:
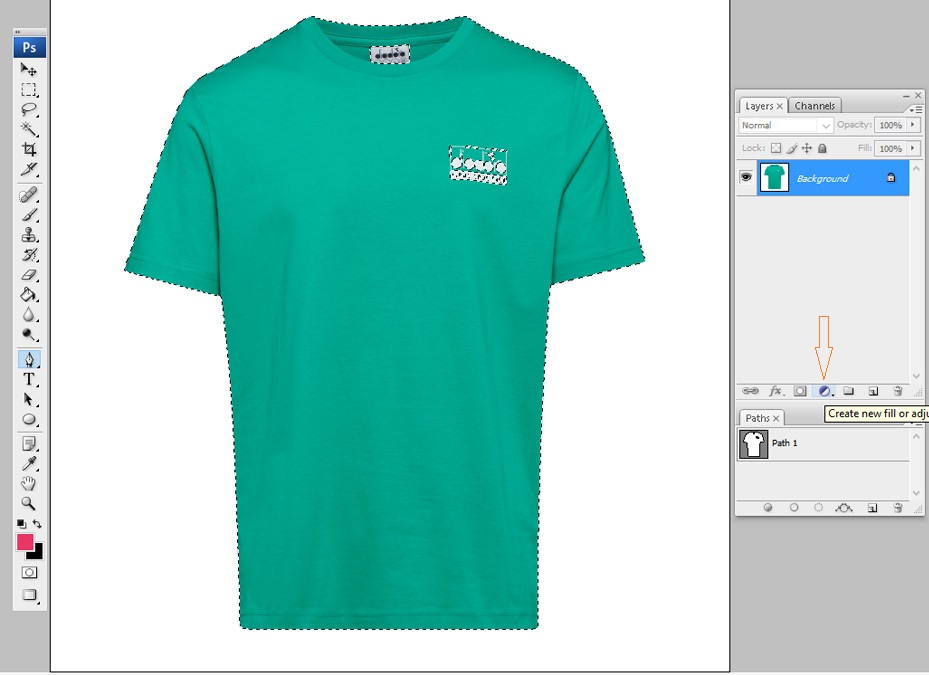
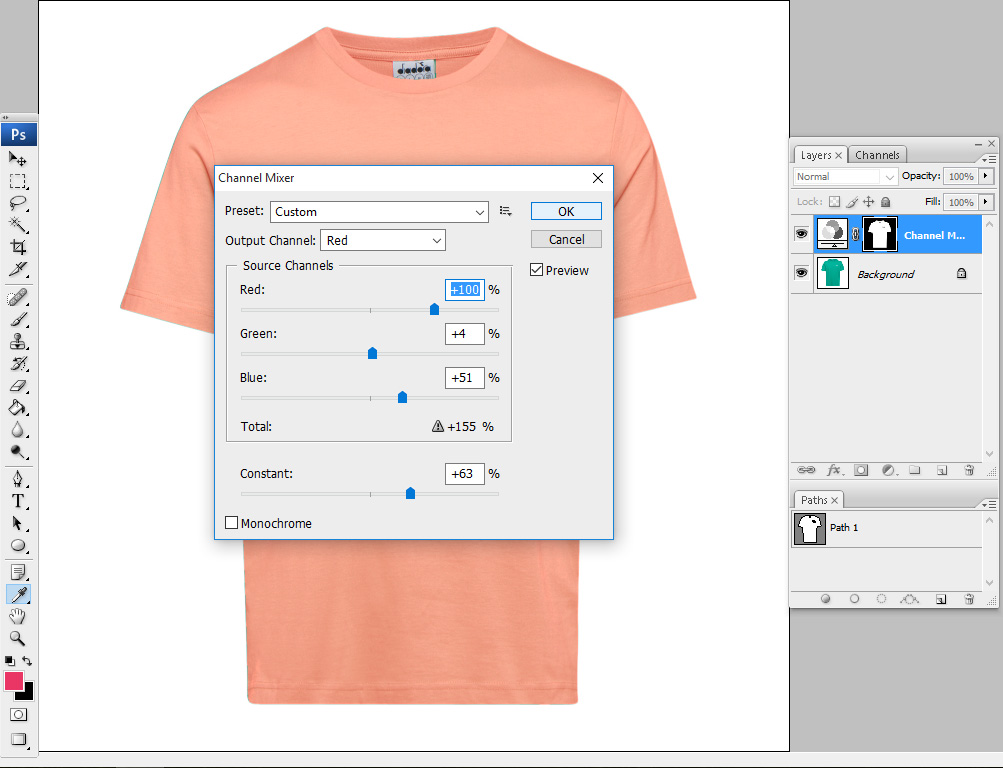
Keep it in your mind we want to convert a light green t-shirt into a deep red. So that we will have to try multiple steps as long as we don’t get our targeted color. First, we try channel mixer. Just click on the adjustment layer and select on Channel Mixer and put the value as it is on the picture below.
#Step 4 Use Color Balance from Adjustment Layer:
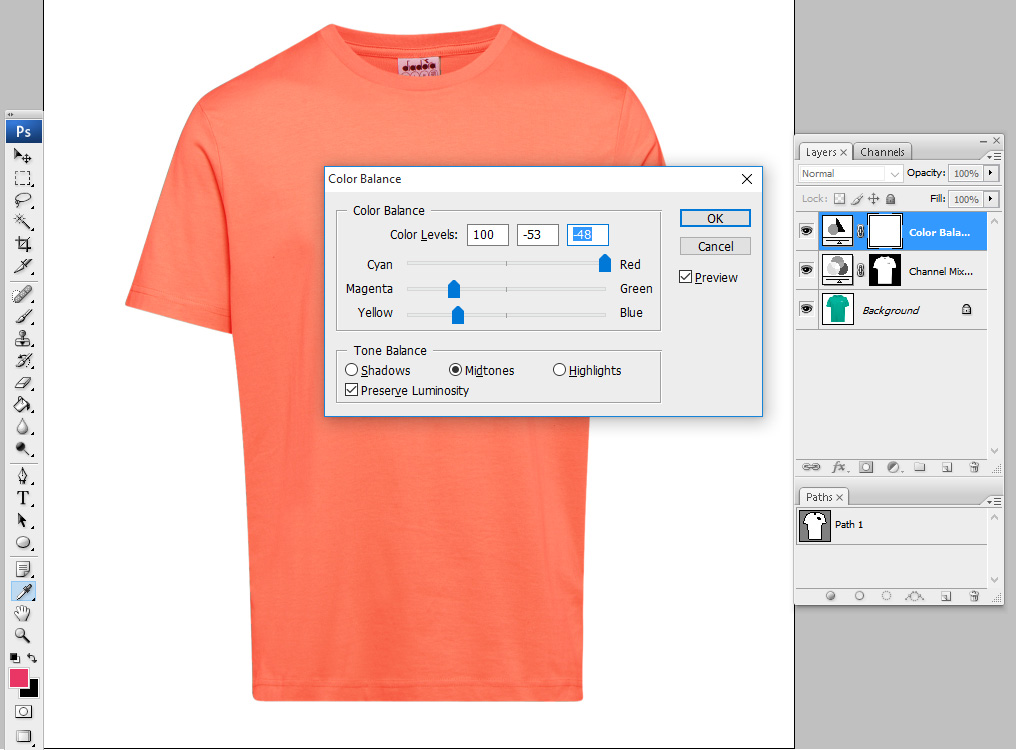
In this stage click on the adjustment layer again and then color balance and put the value as the image below:
#Step 5 Use Selective Color from Adjustment Layer:
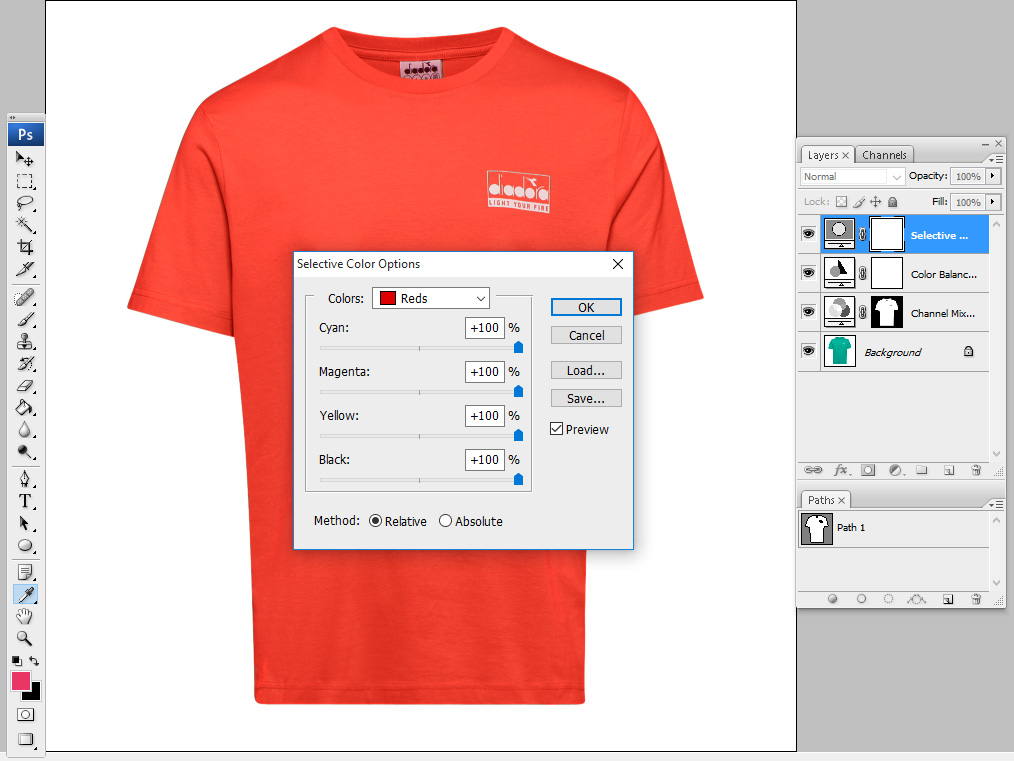
Can you see our targeted color on the t-shirt? I think no. So that keep working on it until getting the final result. Use selective color as the following picture:
#Step 6 Use Photo Filter from Adjustment Layer:
Again you need to use another tool from the adjustment layer that is photo filter. Maybe this is the last stage of our tutorial how to change color of an image in Photoshop photo and I hope we will get a deep red color on the t-shirt we took.
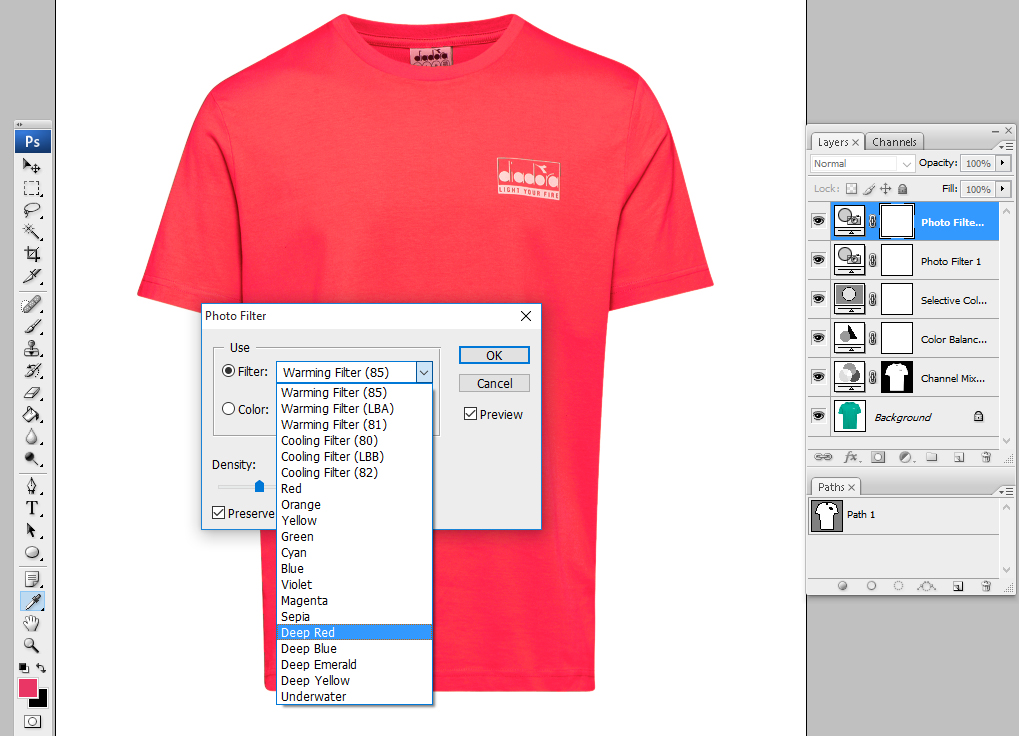
Oh, it is not exactly what we want. Now double click on the photo filter layer and deselect the checkmark in preserve Luminosity section and then click ok. You can see a deep red t-shirt image as we wanted. This is the way to change color of an image in Photoshop.
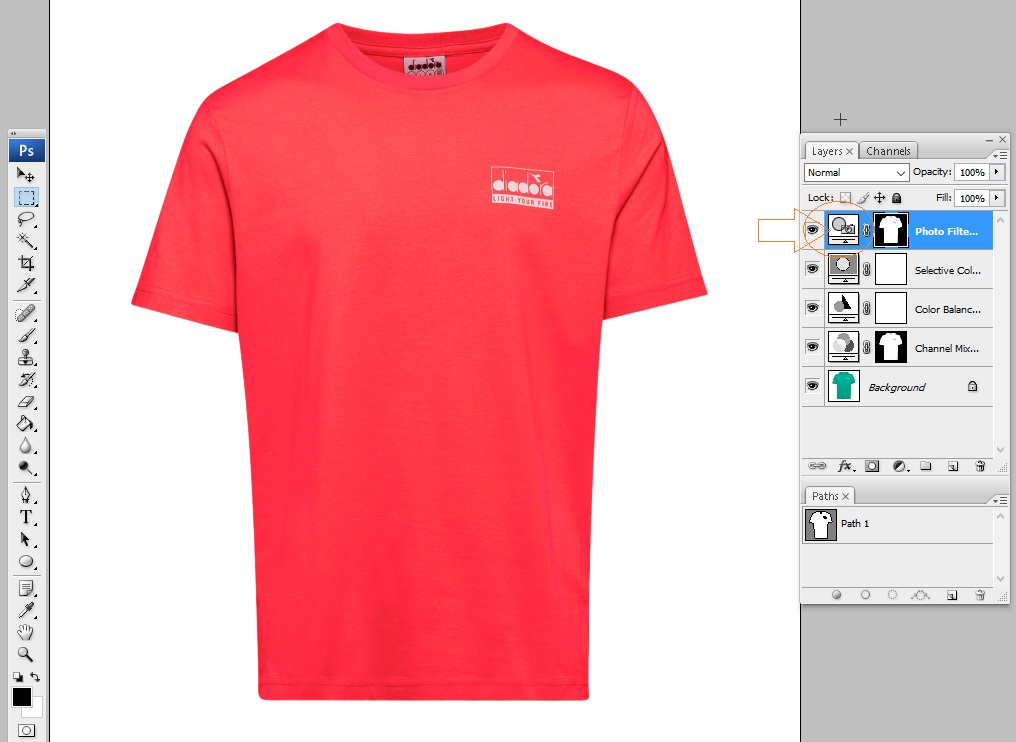
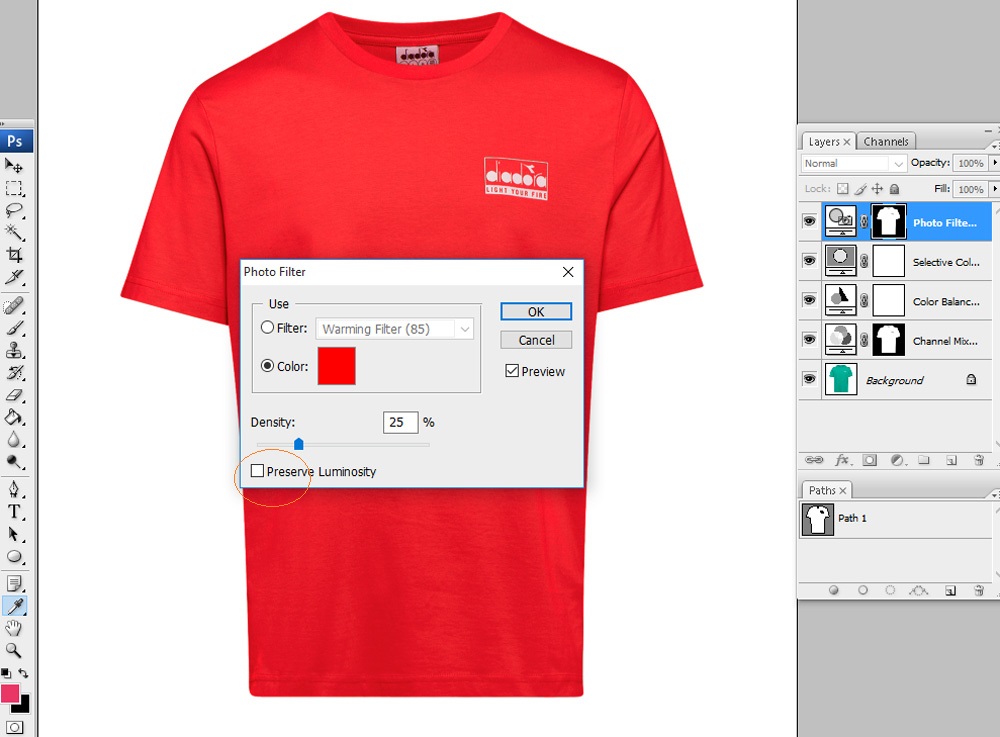
See the final result of the image we work on.

Finally, I will suggest you practice on change color of image frequently several times and you must do it by yourself because we know that “practice makes a man perfect”. That’s why practice and practice and practice if you want to be an expert on Photoshop. If you are a professional and don’t have enough time to work by yourself then you can hire us to change color of your image. Just send us a free trial


