
If you are trying to find out how to change eye color in Photoshop on the internet, then this is the most effective tutorial about how to change eye color in Photoshop within a few minutes. In this tutorial, we are going to use the Hue/Saturation adjustment layer method. This method will help you to play with the color in your eyes.
For this tutorial, I am going to use Adobe Photoshop CC 2021. But you can use any version of Adobe Photoshop to perform this tutorial.
So, let’s see how we change eye colors in Photoshop.
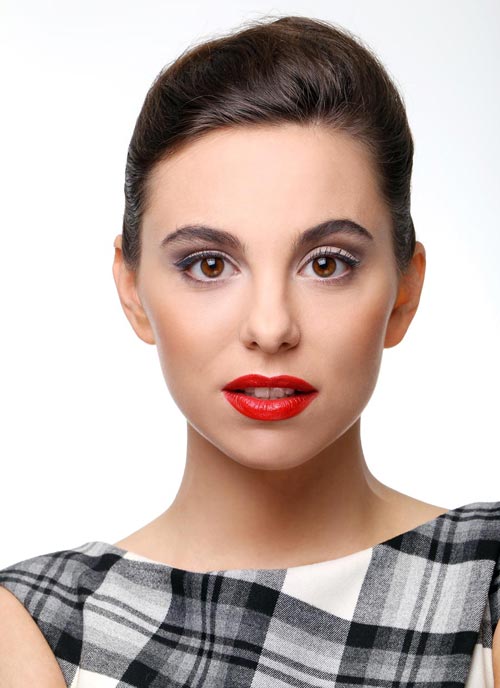
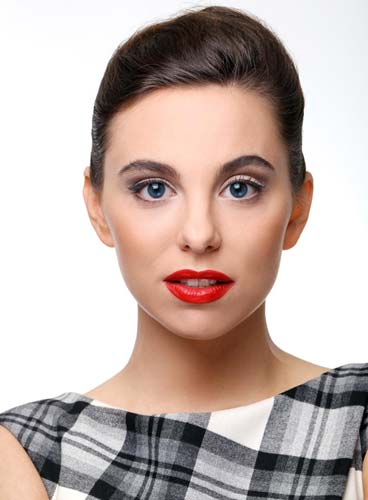
Table of Contents
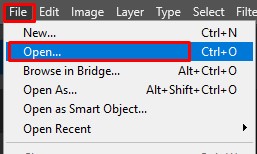
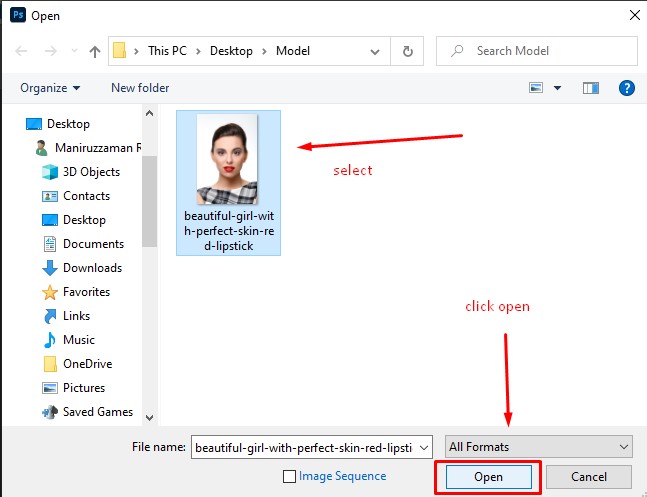
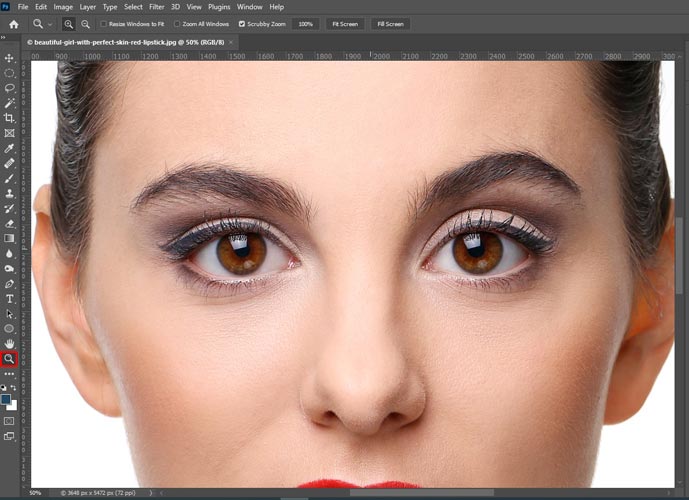
Step 1: Open the Image in Adobe Photoshop
To open the image in Photoshop, click on the file in the menu bar, click open and select the image, and click open on the floating window. You can also use the shortcut key (Ctrl + O) to open the image.
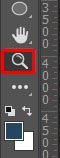
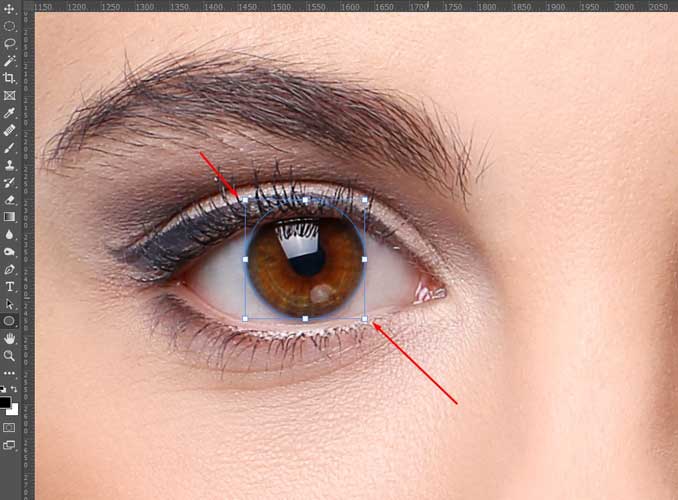
Step 2: Zoom the Image
Now you have to zoom the image. Click on the zoom icon on the left toolbar of your Photoshop or simply press Z on your keyboard and click on the image a few times on the eye part.
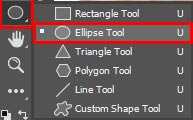
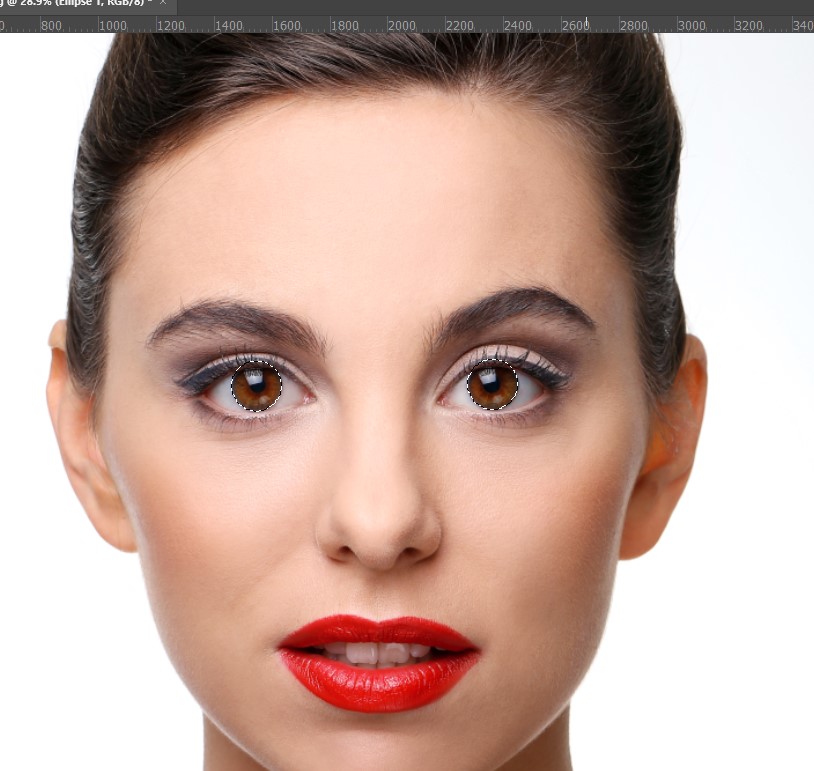
Step 3: Select Ellipse Tool
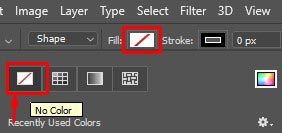
Then, select the Ellipse Tool.
Remember to select the Fill color as no color in the top menu bar after selecting the ellipse tool
Step 4: Draw a Circle with the Ellipse Tool
You have to draw circles on the eyes with the ellipse tool. To make the circle in a round shape, you must press the Shift key when you drag the pointer. And use the space key to place it in the right place. Use the same way to make a circle in the other eye.
And then click Ctrl + Enter to select the eyes circle.
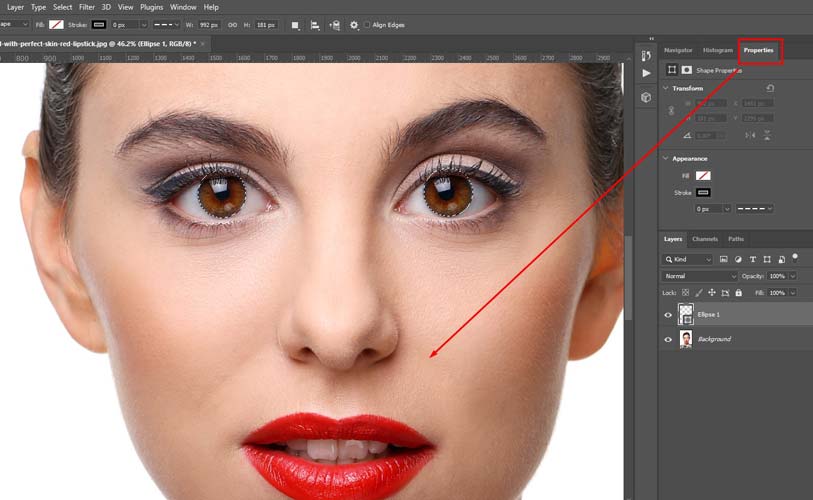
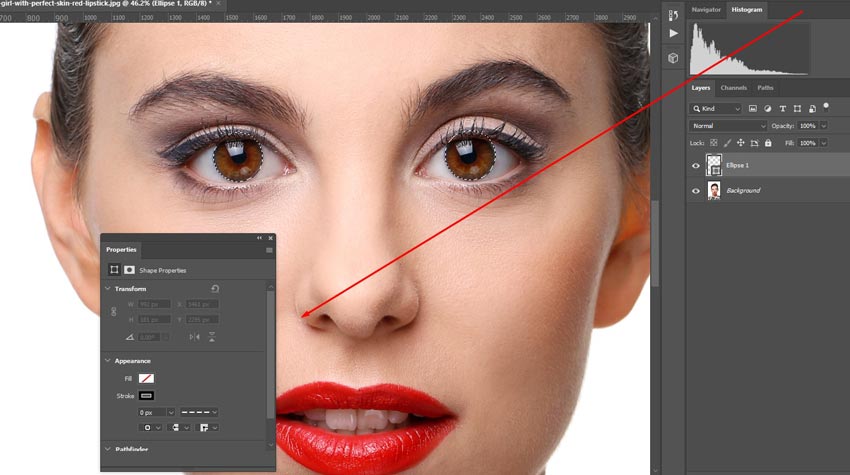
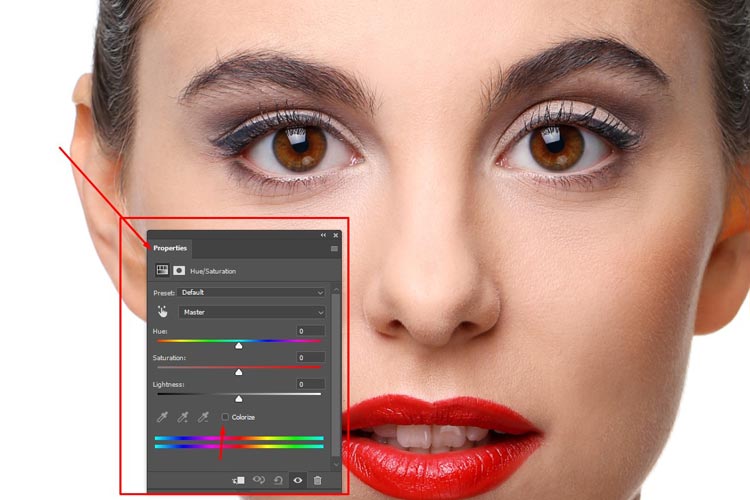
Step 5: Drag the Properties Panel into the Image
We will drag the properties panel into the image to understand how the color works.
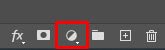
Step 6: Click Adjustment Layer and select Hue/Saturation
Now click on the adjustment layer and then click on Hue/Saturation.
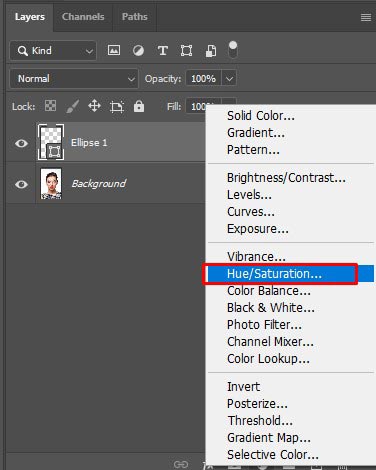
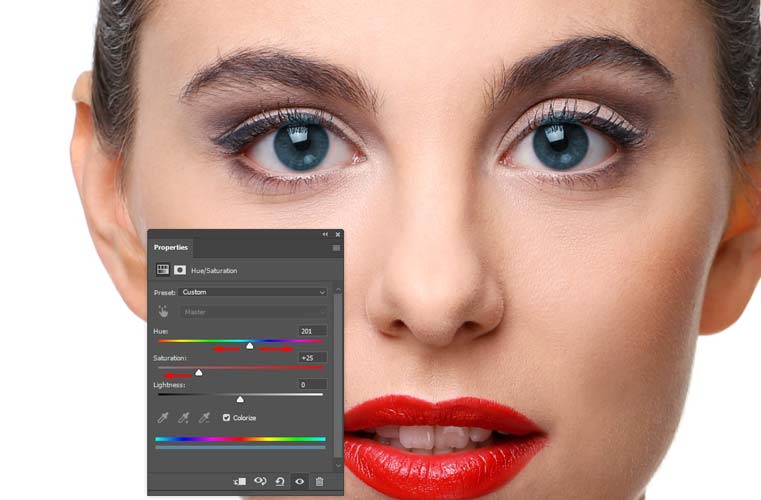
Now it will open Hue/Saturation in the Properties area
Click on the colorize option. You will notice that the color of the eye will change instantly.
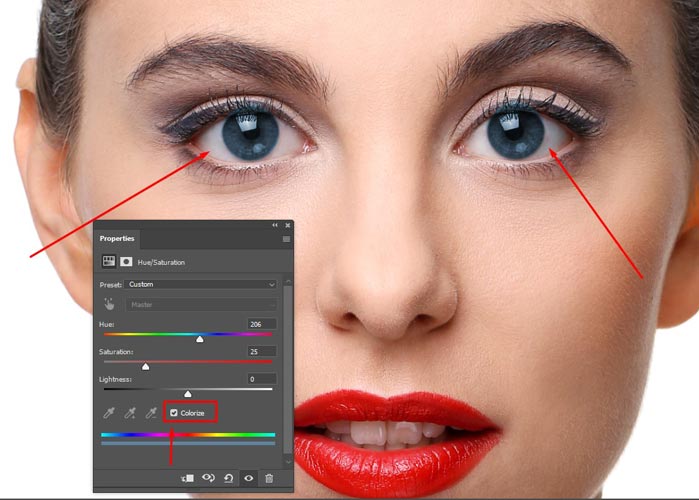
Now drag the hue bar to choose the color you want. As you can see, I have chosen blue color here. Now Draw the Saturation bar to the left to reduce the hardness of the color. Try to barkeep at 20-25. It will be fit then.
After setting it up, you can now close the properties panel by clicking on the right top cross icon. Also, you can get back to the properties panel again by clicking on the Hue/Saturation layer thumbnail to fix any color issues or changes.
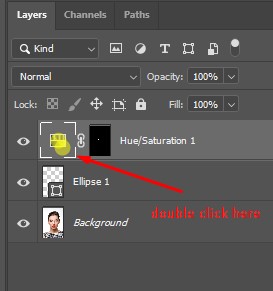
Step 7: Change the Hue/Saturation Layer Mode
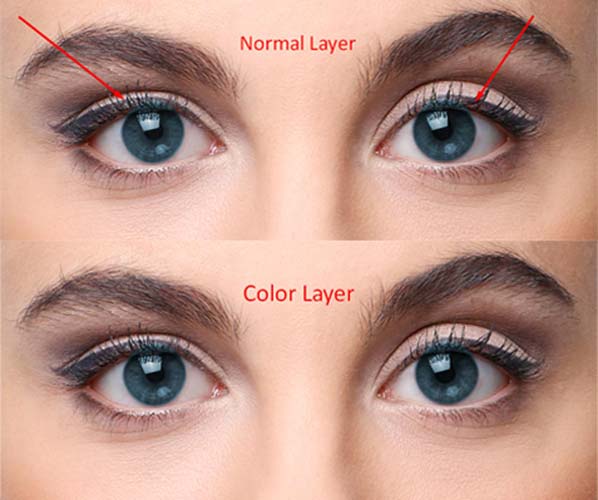
After closing the properties panel, you have to change the Hue/Saturation layer mode from normal to color.
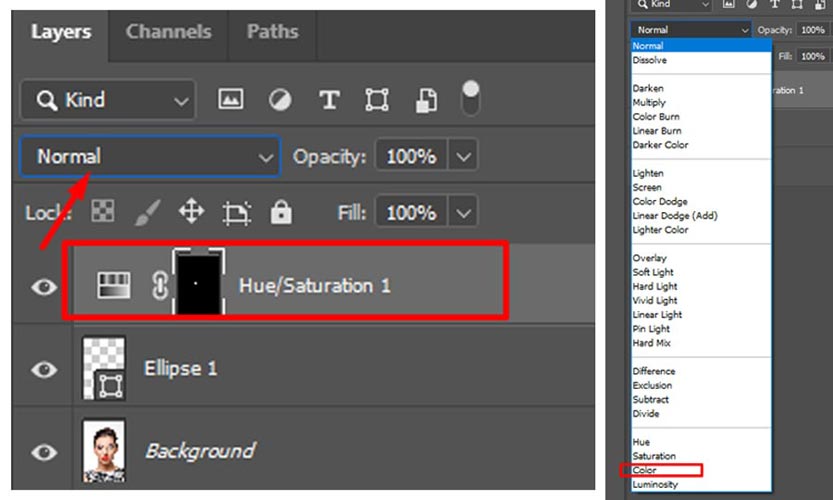
It will brighten the eye color and help to look more original. You can see the differences below.
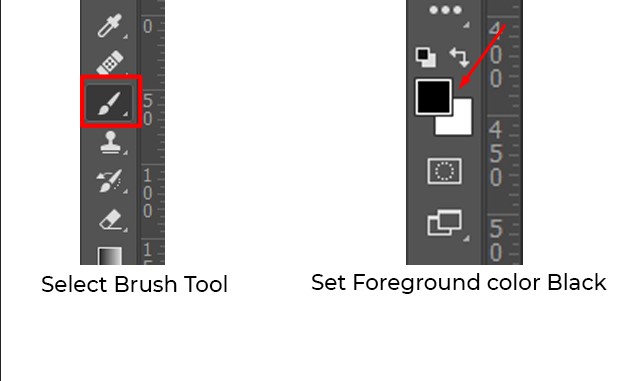
Step 8: Select the Brush Tool
Now select the brush tool and set the Foreground color as black.
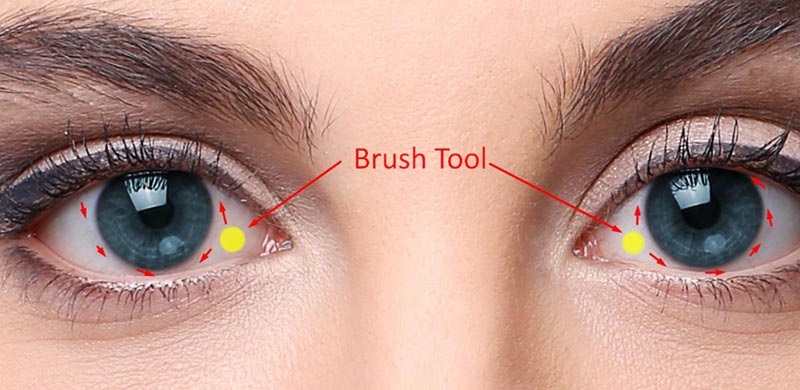
Then click right in the mouse and make the hardness 0%. Zoom in on the eye part of the image.
Then slightly use the brush tool to remove the color field areas out of eye lines. Make sure you have selected the Hue/Saturation layer. You can change the brush tool size by pressing the third bracket. To increase the size of the brush, use this – ( ] ), and to reduce the brush size, use this ( [ ).
It will erase the hue/saturation color and replace it with the original eye lines. If you remove the colors by mistake in others’ eyes, you can undo it or select the foreground color as white and move the brush to the erased areas to regain the hue/saturation color.
This is it, after doing everything, we will get this result.

This is how to change eye color in Photoshop by Hue/saturation adjustment layer. This process is straightforward, and with the outcome of the process, you can see how original it looks.
