
Resize an image is the main concern of using them in online platform. Generally, when you want to upload a photo to your website, you must resize that. When we capture a photo with a high-resolution camera, the size would be huge in proportion. And you should not upload a huge size photo because of the fast loading issue.
However, in this tutorial, we will learn how to resize a photo using Adobe Photoshop and some common tricks of properly resizing a photo. Let’s start step by step photo resizing with Photoshop.
For this tutorial, I have taken a model photo to resize that. I am using Photoshop cc 2017, but you can use this process from any version if you want.
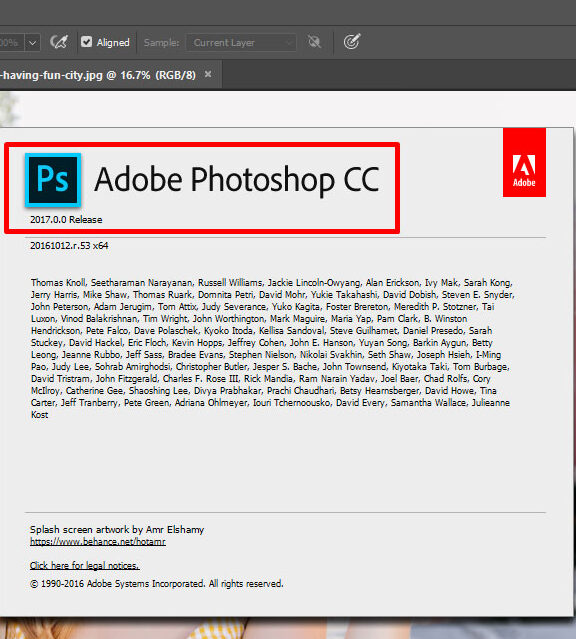
Table of Contents
How to Resize an Image in Photoshop cc by Pixels or Inches:
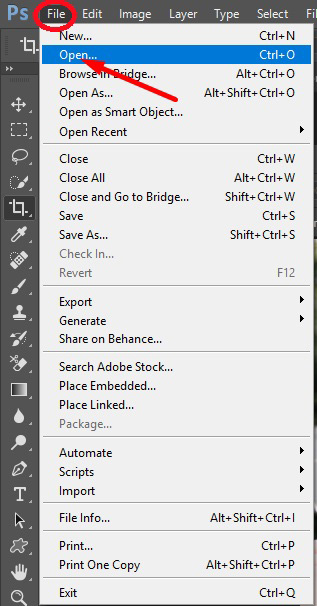
First, you should open the adobe Photoshop tool, click on the top bar’s file, and then click open. You can also use shortcut pressing Ctrl+O for windows and Command+O for Mac.
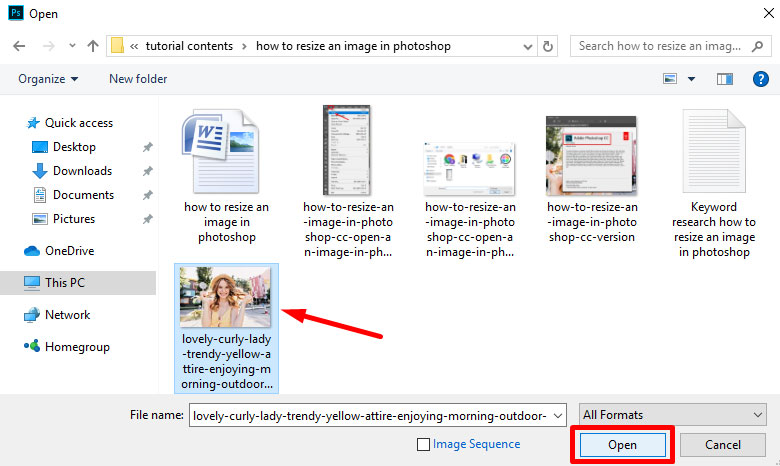
A new dialogue box will open, and that gives you the option to choose your intended photo. Now select the photo from the located folder.

Go to the located folder of your image and click on that, and finally click open.
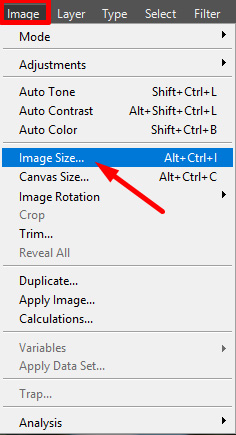
You will get the image in Photoshop software, and you are ready for the photo resizing process. Before resizing an image, you should keep in mind that you should maintain the quality and proportion because a low-quality image is not suitable for any showoff. If you open the image size option in Photoshop, you will see width, height, and resolution in different boxes. To open the image size option, you have to click on the image from the top bar. And then click on image size like the picture below. (use shortcut pressing Ctrl+Alt+I for windows and Command+Option+I for Mac).
Now you can see a dialogue box like below.
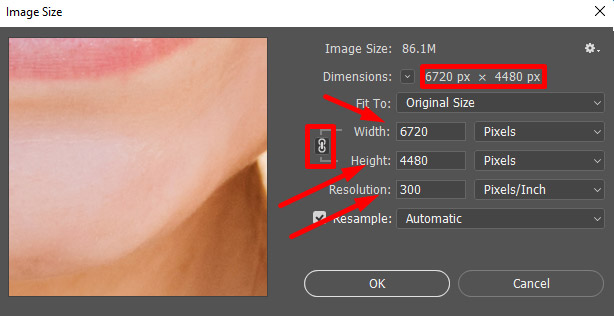
If you take a look at the above screenshot, you can notice some red marks on that. The red mark areas are significant to crop an image properly. In the first red box, there is the original dimension 6720px X 4480px which is very high to use in a website. We need to reduce the size and make a typical web size photo. 900 is the standard width size for using an image on a website, but it can be varied from the web to web. So, you can use it as your requirement.
Now we will adjust the width and height section. If we want to keep the photo in accurate shape, then we should keep the width and height combined with the link sign. If you notice the resolution box where the value is 300, which is called dpi, and it depends on where do you use the photo. For printing purposes, dpi, 300 is standard, and for electronic media, dpi 72 is best for an image.
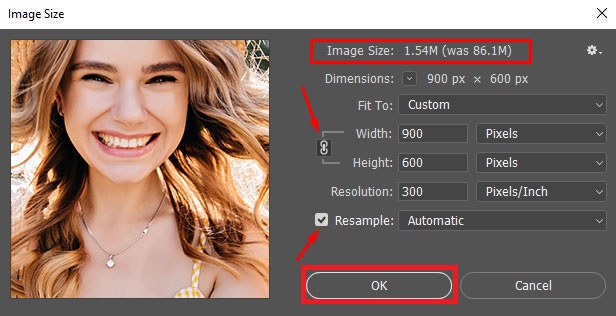
In the screenshot, we reduced the photo width 6720 to 900, and the height is automatically adjusted as the height and width are linked to each other. Also, you should make sure to keep the checkmark on resample for adjusting width and height. Now there is a change in image size from 86.1M to 1.54M. You may notice I keep the dpi 300 and change that in the next step.
How to Change Resolution or DPI:
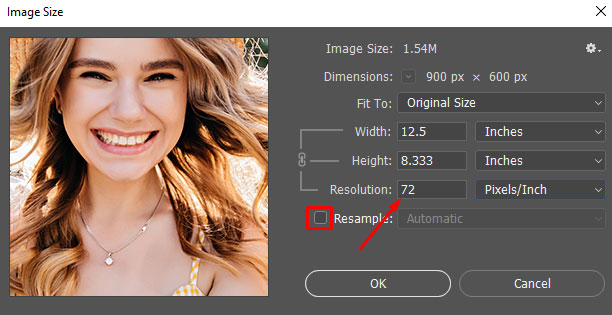
In this step, we again go to the image size option as before using shortcut pressing Ctrl+Alt+I for windows and Command+Option+I for Mac. The image size dialogue box will open again, and we uncheck the resample and change the image resolution 300 to 72. And click ok.
How to Resize an Image in Photoshop with Presentence:
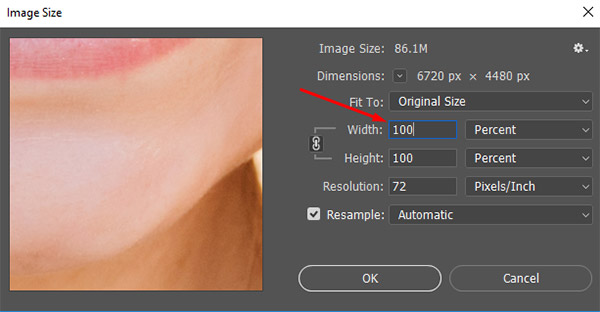
This option is almost the same as pixels or inches. You just open the image size dialogue box and click on the pixels as marked in the following photo.
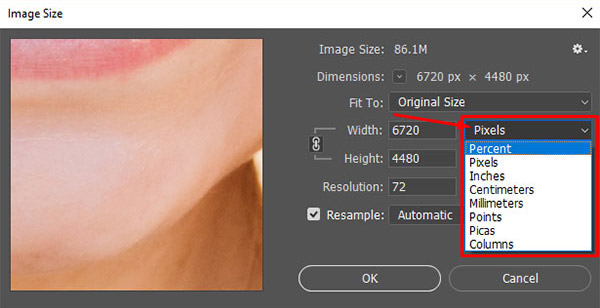
After selecting the percent, you can see the 100 in the width box and change the value as your requirement.
Final Words:
In this tutorial, I tried to show how to resize an image in Photoshop cc. If you follow the steps perfectly then you can resize any photo within a very short time. If you need any help to resize your image you are most welcome to contact us.


